 |
||
Got The Dining Fly Equipment? Let's Get Started Then....Miss the equipment list and description? Click hereThe Set UpTo set up a dining fly takes a little planning and a little skill. We have taught this to boys as young as 11 years old so do not be intimidated by the number of steps. It is easy to do once you have practiced several times. As with setting up a tent, I recommend setting up your dining fly at home a couple of times so you do not run into trouble once you get to camp. Where To Put It?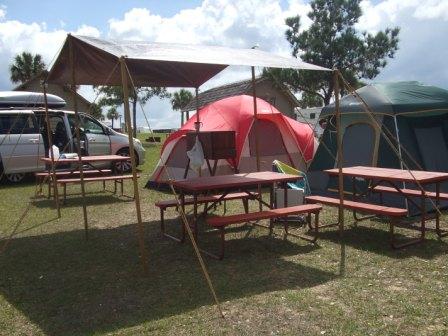
The first step is to select the site. We generally set up our family camp site with the dining fly in the center, a tent on each of two adjacent sides, the cooking and camp fire on one side and the last side open to the path or road leading to the camp. If wind is a major factor, then we set up the dining fly with the long side facing the wind. This will cause less wind loading on the fly and make setup much easier. If wind is not a problem, then we set up with long sides facing north and south. This provides the most protection from the sun. Spread Out The Tarp
Spread your tarp out on the ground as you intend for it to be positioned once it is erected. Push a stake through each corner grommet and a couple of inches into the ground if the wind is blowing the tarp. Lay the short poles next to each corner of the tarp. I place the bottom end right at the tarp corner so it marks the spot where I expect it to be once it is upright. Lay the long poles next to the center of each long side. Again, place the bottom of each pole next to the center grommet so it marks its position when it is upright. Set The StakesEach stake should be driven into the ground using a hammer or mallet. The stakes should be angled 45 degrees away from the fly. Each stake should be place approximately one pole length away from the edge of the fly to achieve the correct guy rope angle. 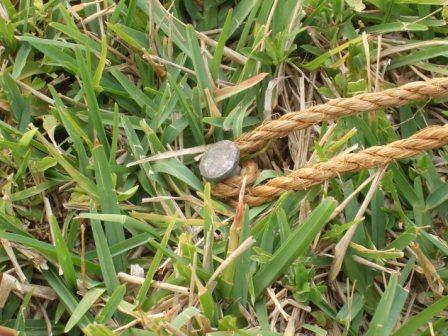
Tie The RopesThe ropes can be tied once when you assemble the fly for the first time and then left in place when the fly is taken down and stored. The two knots used are simple. We teach these knots to 9 and 10 year olds. It takes a little practice to master and remember but they will serve you well in many camping situations. The first knot is call two half-hitches. It secures the top end of the rope to the top of the pole. Allow 6 of rope to work with. See the picture. Make a U around the stud at the top of the pole after the stud has been inserted through the tarp grommet. Next, take a turn with the running end of the rope around the standing part of the rope. That is one half-hitch. Take one more turn. That is the second half-hitch. Snug the entire knot against the stud. This knot will slide off the top of the stud whenever the rope is not tight. This allows for easy storage without having to untie the knot. The second knot is used to secure the guy rope to the stake and adjust the tension on the rope. It is called the taut-line hitch or the chimney hitch. As this knot is very similar to the first, it should be only slightly more difficult to tie. Start by allowing 8 of rope for the working end. Make a U around the stake. (See the picture.) Take two turns around the standing part of the rope with the working end of the rope. Tie another half-hitch below this. Snug up the knot. It should grip the standing part of the rope tightly when under tension yet slide along the standing part when the tension is released. This allows the rope to be adjusted to just the right length and tension. Setting Up The Center PolesThis is probably the most challenging point is setting up the dining fly if it is windy. It is best to have two people working together but it is still quite manageable by one experienced person. Now that all the stakes are driven and the ropes are tied you can start to put all the pieces together. If it is windy start with the center pole that is upwind. Wrap the loop of the previously tied guy ropes for the center pole around the appropriate stakes. Pass the stud of the pole through the appropriate grommet and slip the previously tied knot of two guy ropes over the stud. Stand the pole up, tarp and rope assembly so the pole is almost straight up but leaning slightly away from the stakes and toward the center of the fly area. Adjust the taut-line hitches as needed to hold the pole in the correct position. The weight of the tarp and the tension of the guy ropes will hold the pole in the correct position until the other center pole is erected. Repeat the process with the other center pole. Adjust the guy rope tension until the poles are in completely upright and the tarp is stretched tight between them. The tarp should now be folded in half with the folded edge up and the two short ends hanging down toward the ground, sort of like a sheet hanging on a clothes line. 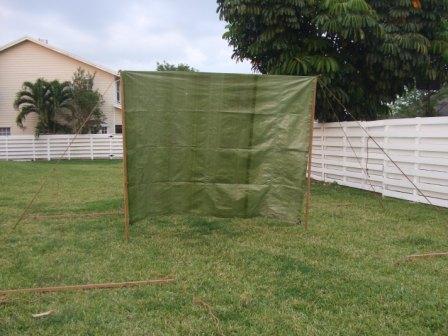
Finishing Up With The Corner Poles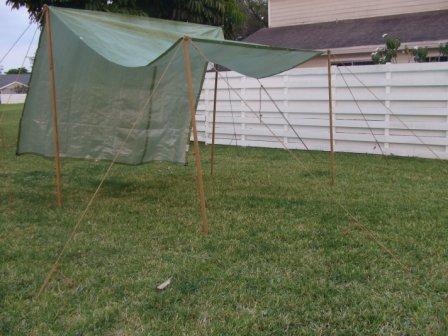
Place each of the corner poles in a similar fashion. Do not worry about getting the guy ropes completely correct until all the poles and guy ropes are in position. Now you can adjust each guy until the fly is uniformly taut. 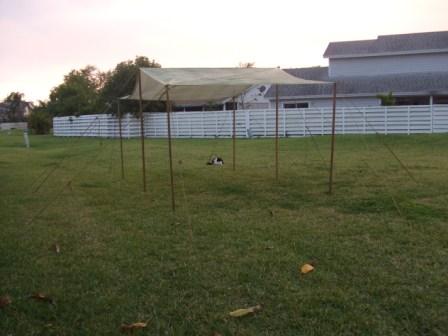
Here is some help with some of the camping knots
Need The Dining Fly Equipment List? Return To Your-Camping-Guidebook.com Home Page From Dining Fly Set Up Instructions |
Burning Issues
Subscribe To Our Newsletter
"Around The Campfire"
You Will:
|
|
Can't Find It?
|
||
|
Copyright©
2007-2009. Your-Camping-Guidebook.com
|
||


